Last Updated on November 22, 2025
We’ve previously covered alternatives to Google Photos recommending PhotoPrism as our preferred solution. PhotoPrism is an AI-powered photos app for the decentralized web. It uses modern technologies to tag and find pictures. The software can be run at home, on a private server, or in the cloud.
Immich is a self-hosted photo storage and sharing service with backup functionality. If you don’t want your photos firmly under someone else’s control, you might like Immich. The software makes your media accessible for all your devices including mobile devices.
It’s free and open source software.
Installation
The developer provides an install script which actually isn’t intended for production use. But as we’re evaluating the software only, we plumped for this installation method. To download and run this script issue the command:
$ curl -o- https://raw.githubusercontent.com/immich-app/immich/main/install.sh | bash
We’re pleased to report the install script works like a charm and simplifies the installation significantly.
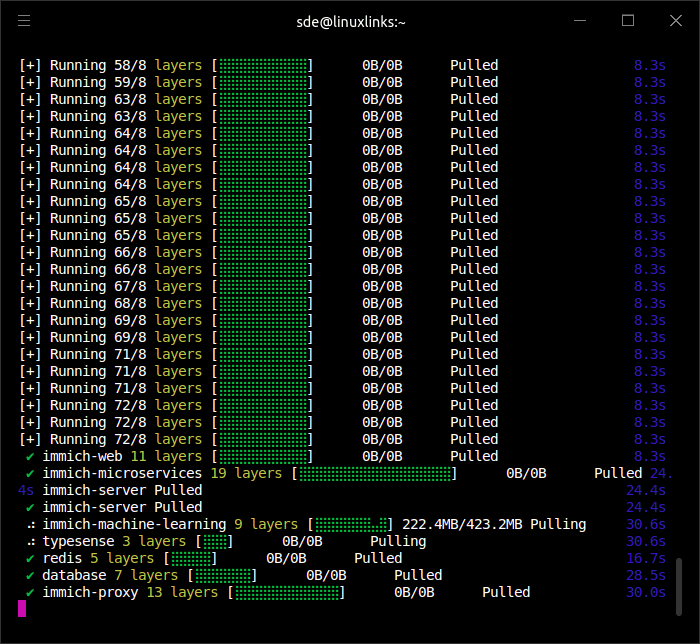
Here’s an image of the installation in progress,

If everything proceeds normally (it did for us), you’ll see the message:
Succesfully deployed Immich!
You can access the website at http://:2283 and the server URL for the mobile app is http://:2283/api
The library location is /home/sde/immich-app/immich-data
---------------------------------------------------
If you want to configure custom information of the server, including the database, Redis information, or the backup (or upload) location, etc.

1. First bring down the containers with the command 'docker-compose down' in the immich-app directory,

2. Then change the information that fits your needs in the '.env' file,

3. Finally, bring the containers back up with the command 'docker-compose up --remove-orphans -d' in the immich-app directory
If you get the error message “Cannot connect to the Docker daemon at unix:///var/run/docker.sock. Is the docker daemon running?”, follow our Getting Started with Docker: Run Docker without sudo guide.
Following a successful installation, next point your web browser to http://localhost:2283 and you’ll see the image.

Clicking the Getting Started button takes you to admin registration where you set the admin email, admin password, and personal details (first and last name). You can then login with the email address and password you chose.
You can also deploy Immich using Docker Compose, Kubernetes, Portainer, and Unraid.
Next page: Page 2 – Post-Installation
Pages in this article:
Page 1 – Introduction / Installation
Page 2 – Post-Installation
Page 3 – In Operation
Page 4 – Summary
