Linux offers a huge array of open source music players. And many of them are high quality. We’ve reviewed the vast majority, but we’re endeavoring to explore every free music player in case there’s an undiscovered gem.
Music Player Daemon (MPD) is a powerful server-side application for playing music. In a home environment, you can connect an MPD server to a Hi-Fi system, and control the server using a notebook or smartphone. You can, of course, play audio files on remote clients. MPD can be started system-wide or on a per-user basis.
pimpd2 is a command-line based MPD client. This is free and open source software written in Perl.
Installation
We tested pimpd2 under Ubuntu 23.10.
With any MPD client, the first step is to install and configure MPD.
We recently published a a short tutorial to get you up and running with MPD for Ubuntu 23.10.
Next up is to install pimpd2. We didn’t find any packages for Ubuntu, and checking with bauh also drew a blank. But this wasn’t an issue.
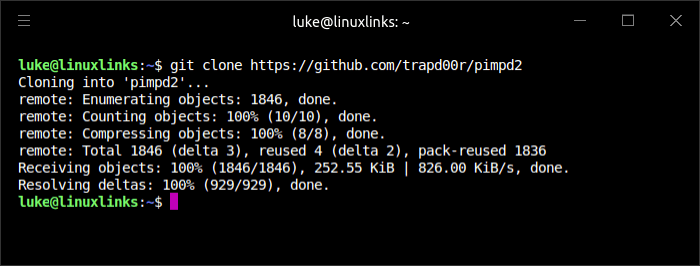
Clone the project’s GitHub repository:
$ git clone https://github.com/trapd00r/pimpd2

Change into the newly created directory:
$ cd pimpd2
There’s a binary pimpd2 in that directory. Let’s copy that file to a directory on our $PATH e.g. /usr/local/bin
$ sudo cp pimpd2 /usr/local/bin
We need to install five Perl modules. These modules are installed using CPAN, the Comprehensive Perl Archive Network, which is a great repository of Perl modules.
$ sudo apt install cpanminus
Fetch, build and install the Audio::MPD, Config::General, Term::ExtendedColor, File::LsColor, and App:Pimpd modules with the commands:
$ sudo cpanm Audio::MPD
$ sudo cpanm Config::General
$ sudo cpanm Term::ExtendedColor
$ sudo cpanm File::LsColor
$ sudo cpanm App::Pimpd
Next we need to create a pimpd2.conf configuration file. The doc directory has an example configuration file. It’s best to copy the file to ~/.config/pimpd2/pimpd2.conf and then edit it accordingly to reflect where your music directory, playlist directory etc are located.
Next page: Page 2 – In Operation
Pages in this article:
Page 1 – Introduction / Installation
Page 2 – In Operation
Page 3 – Summary

