Last Updated on August 11, 2021
In Operation
First off, Siren performs admirably playing tracks. I didn’t experience any issues in this regard. There are common key bindings which let you play/pause/stop tracks, move between tracks, skip forward and back by 5 seconds / 1 minute / 5 minutes, change the volume, and more. The different views have a few additional key bindings.
The software supports popular file formats including Ogg Vorbis, MP3, Opus, FLAC, AAC, WavPack, WAVE and AIFF. That’s more than enough for most music enthusiasts.
Commands alter the appearance and behavior of Siren. They are entered with : followed by the command. There’s a whole list of commands. If you’re looking for a preferences section to configure the software, you’ll be disappointed. The appearance and behavior of Siren is altered with commands.
Any music player worth its salt offers gapless playback. Gapless playback is the uninterrupted playback of consecutive audio tracks, such that relative time distances in the original audio source are preserved over track boundaries on playback. It’s essential if you listen to classical, electronic music, concept albums, and progressive rock. Sadly, Siren doesn’t offer gapless playback although its developer says this is a feature he’s interested in adding.
Siren has 4 views. Let’s go through them in turn.
Library View
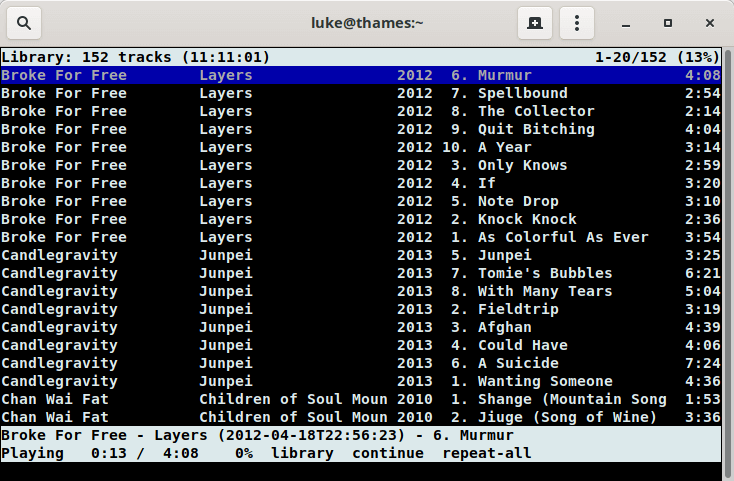
Here’s where you see all the tracks in your library. It’s the view you’ll see on startup. Unless you’ve added your library via the config file, the view will initially be blank. You need to tell the software where your music library is stored with a command. For example, if your music is stored in ~/Music/, type:
:add-path -l ~/Music/
Siren will add all the supported audio to the library. It automatically adds audio tracks found in any sub-directories of the directory specified in the add-path command.
Here’s the library view in action.

As you can see from the image above, the design is very basic. All tracks are listed in one long list, which could be really long if you have a ton of tracks in your library. To change the displayed format, you can use the library-format command. It lets you show album, album artist, artist, comment, date, disc number, disc total, duration, filename, genre, path, title, track number, and track total.
Contrast this with musikcube, where artists and tracks are shown in different panes and you can browse by artist, album,, genre, album artist with a single keystroke. This makes navigation much easier.
If you’ve changed to a different view and want to revert back to the library view, press 1.
Playlist View
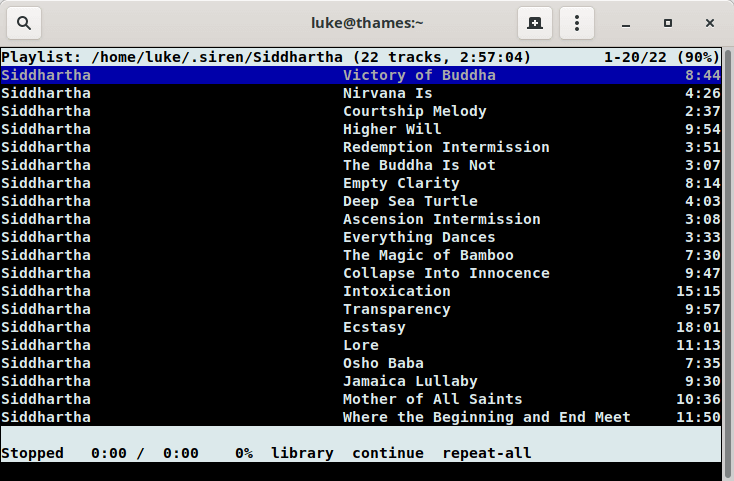
The playlist view shows the playlist loaded with the load-playlist command. It’s displayed with the 2 key.
Playlists aren’t one of Siren’s strong points. Each playlist has to be a separate file with each line containing the path to a track.
When you’ve added your music library, it populates ~/.siren/library with all the tracks, containing the path to each track. With a text editor, it’s a matter of copying and pasting the lines into a separate file, and then loading the playlist with the command load-playlist. It works, but it’s hardly an elegant solution.

Browser View
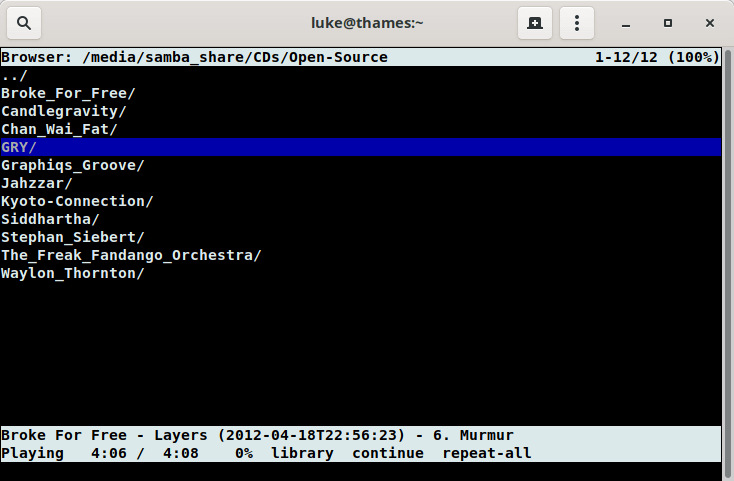
The browser view shows the contents of a directory. By default only directories and supported audio files are shown. The browser view can be used to browse through the file system and play back audio files or add them to the library or queue.
The browser view is displayed by pressing the 3 key.

Queue View
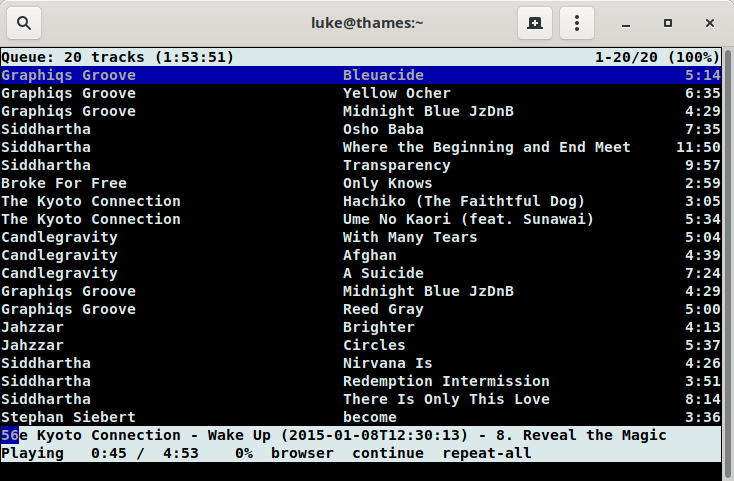
The queue view shows all tracks that have been added to the queue. Tracks in the queue will be played back before those in other views. A track is removed from the queue as soon as it is being played back. The queue view is displayed by pressing the 4 key.
Present in all views, there’s a few lines at the bottom. Right at the bottom is a status line which shows any error and informational messages. Most of the time this is blank. The two highlighted lines above show playback-related information including the currently played track, the track position, and more.

Next page: Page 3 – Other Features & Memory Usage
Pages in this article:
Page 1 – Introduction / Installation
Page 2 – In Operation
Page 3 – Other Features & Memory Usage
Page 4 – Summary
