Alternative way to set up a container
I strongly recommend using the approach set out in Page 2 to set up Docker containers on a Synology NAS device. For completeness, I’ll briefly explain the other way.
With this second way, we can take a container and do the same thing as the YAML file but use the GUI to do it.
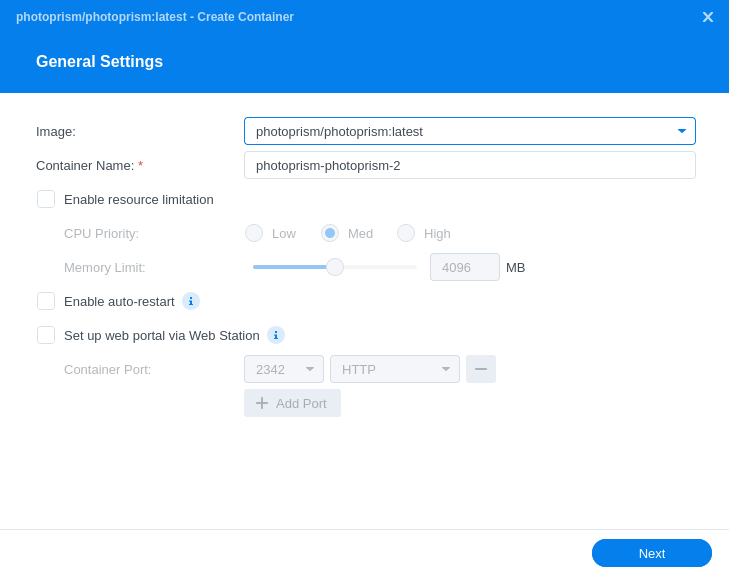
Go to Container tab, and click Create.

You then see a General Settings box.

In the image above, I’ve selected the photoprism image from the dropdown list. The Container Name has been chosen for me but that can be changed. I can enable limit resources, turn on auto-restart. There’s also an option to provide HTTP/HTTPS services to the container via Web Station. I’ll leave these unchanged, and click Next.
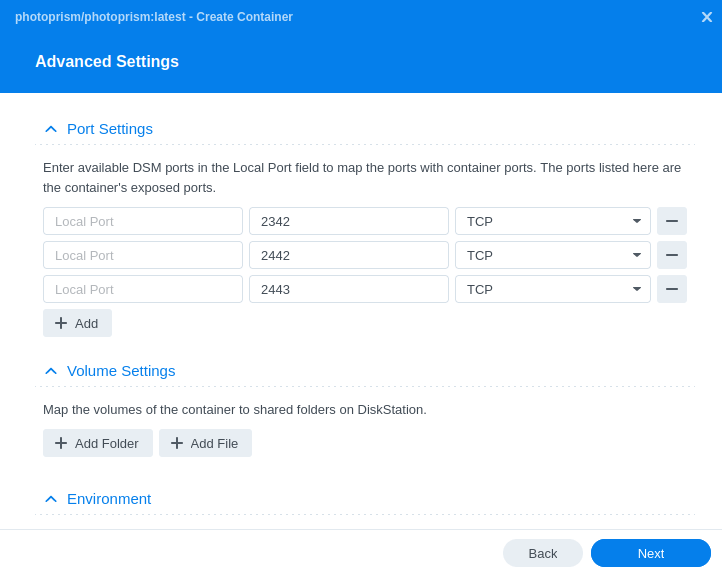
In the Advanced Settings, I can enter port settings, map the volumes of the container to shared folders, define environment variables, capabilities, network, and more. Basically, all the things that are done in the YAML file.

While you might think a GUI makes it easier, it’s actually MUCH quicker with the “editing a YAML file approach” as explained on Page 2.
To wrap up, I hope this helps you get started with Container Manager. It’s one of the most interesting packages available in the Package Center.
Pages in this article:
Page 1 – Install Container Manager
Page 2 – Create Project (with PhotoPrism as example)
Page 3 – Running PhotoPrism on the NAS
Page 4 – Alternative way to set up a container
All articles in this series:
| Synology DSM | |
|---|---|
| DSM | Review of DiskStation Manager 7.2.1 |
| Container Manager | Container Manager for Beginners |
| Hyper Backup | This is a tutorial showing you how to use Hyper Backup |
| Hyper Backup Explorer | Desktop tool for browsing, decrypting, and extracting backup data |
