Last Updated on March 24, 2023
In Operation
Before thinking of dabbling with partitions, it’s vital to remember that there’s a risk of losing data when editing partitions. While GParted seeks to reduce that risk, no software can totally eliminate the possibility of losing data. It’s therefore important to back up your data first. And make sure you don’t perform actions on any mounted partitions.
When you start GParted, it scans your computer for disk devices. These can be hard disks, flash memory devices, and RAID devices.
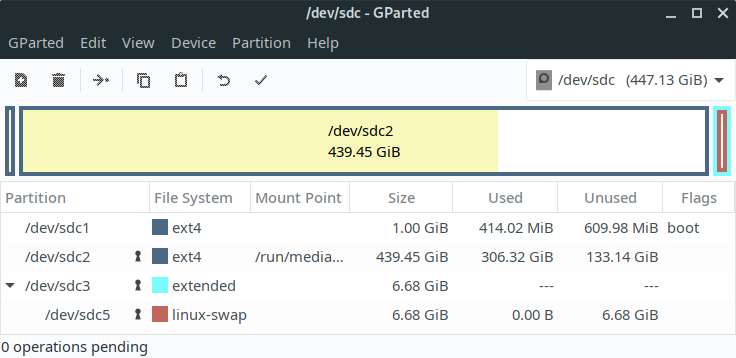
The graphical interface is very easy to use. Here’s the GParted window on one of our test machines.

From top to bottom, there’s a menubar, and a toolbar. Adjacent to the toolbar, there’s a dropdown list which defaults to /dev/sda. The dropdown offers a list of available drives. There’s also a visual representation of the partitions on the selected disk device, and a status bar showing any activity in progress or queued.
The graphical interface makes it really simple to resize partitions. You can change the volume label.
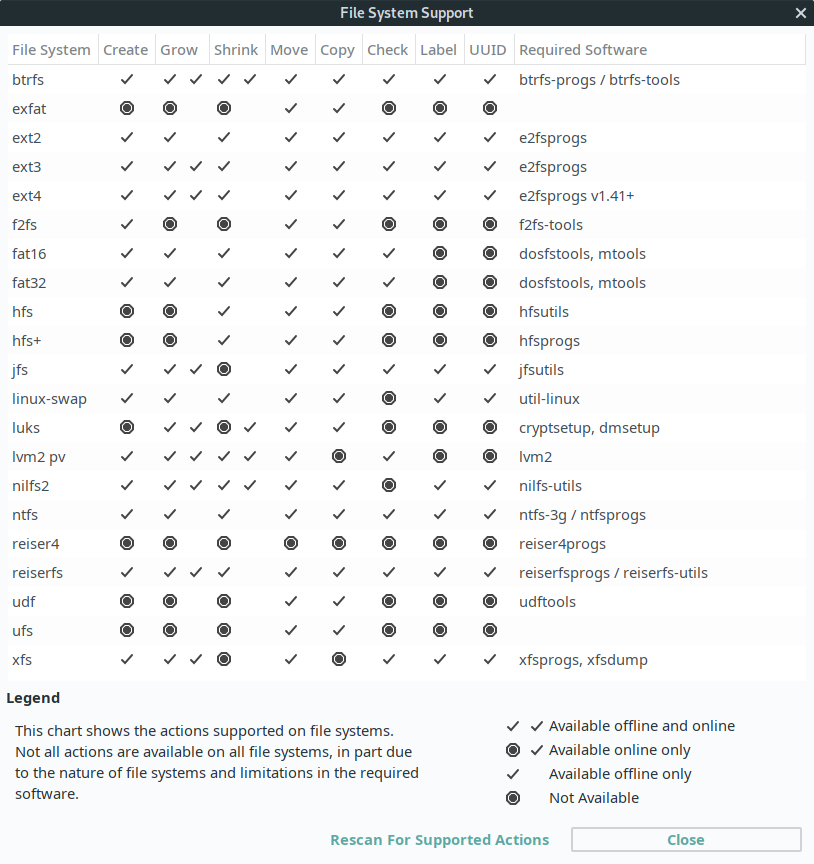
There’s wide support for different file systems including common ones like ext4, NTFS, FAT, and less common ones. The software shows what file system support is available on your system from “View / File System Support”. Here’s the output from our machine.

The latest releases have added file system support for minix and UDF, and the ability to recognize APFS Apple file system.
You are not tied to a graphical interface. You can run GParted from the command line.
Next page: Page 3 – Other Features
Pages in this article:
Page 1 – Introduction / Installation
Page 2 – In Operation
Page 3 – Other Features
Page 4 – Summary

